Cutting tiles with precision can be a daunting task, but with the right tools and techniques, it can become a straightforward and even enjoyable process. In this blog, we’ll explore how you can master the art of cutting tiles precisely, ensuring a flawless finish to your tiling projects. Whether you’re a novice or a seasoned DIY enthusiast, this guide is here to help.
Understanding Your Tile Cutter
Before you begin cutting tiles, it’s crucial to familiarize yourself with your tile cutter. Different types of tile cutters offer various features and capabilities, and knowing how to operate yours effectively is the first step towards achieving precise cuts.
Manual tile cutters are a common choice for many DIY enthusiasts due to their ease of use and affordability. However, they may require more physical effort compared to electric cutters. Understanding the specific strengths of your manual cutter, such as its cutting width and scoring ability, can greatly influence the quality of your cuts.
Electric tile cutters, in contrast, provide speed and precision with less physical exertion. They are particularly useful for cutting through harder materials like porcelain and stone. It’s important to get acquainted with settings like blade speed and cooling systems, which can affect the smoothness and accuracy of your cuts. For an in-depth review of electric tile cutters’ features, researching online resources can be incredibly helpful.
Selecting the Right Tile for the Job
The type of tile you choose can impact the ease and precision of your cuts. Understanding the material, thickness, and intended application will help you select the best tile for your project, ensuring clean and accurate cuts every time.
For instance, ceramic tiles are generally easier to cut and ideal for wall installations. Meanwhile, porcelain tiles are denser and more suitable for floors or high-traffic areas due to their durability. Consider the color and texture of your chosen tiles as well, since these visual aspects can influence the look and feel of your finished project.
Glass tiles add an elegant touch but require delicate handling. Using a cutter specifically designed for glass will significantly reduce the risk of chipping or cracking. If you’re considering mosaic tiles, ensure your cutter supports the intricate work needed for smaller pieces to prevent breakages and misalignments during installation.
Step-by-Step Guide to Making Precise Cuts
Achieving precise cuts requires careful measurement, marking, and cutting. In this step-by-step guide, we’ll walk you through the process, sharing tips and tricks to ensure every cut is exact and meets your project’s needs.
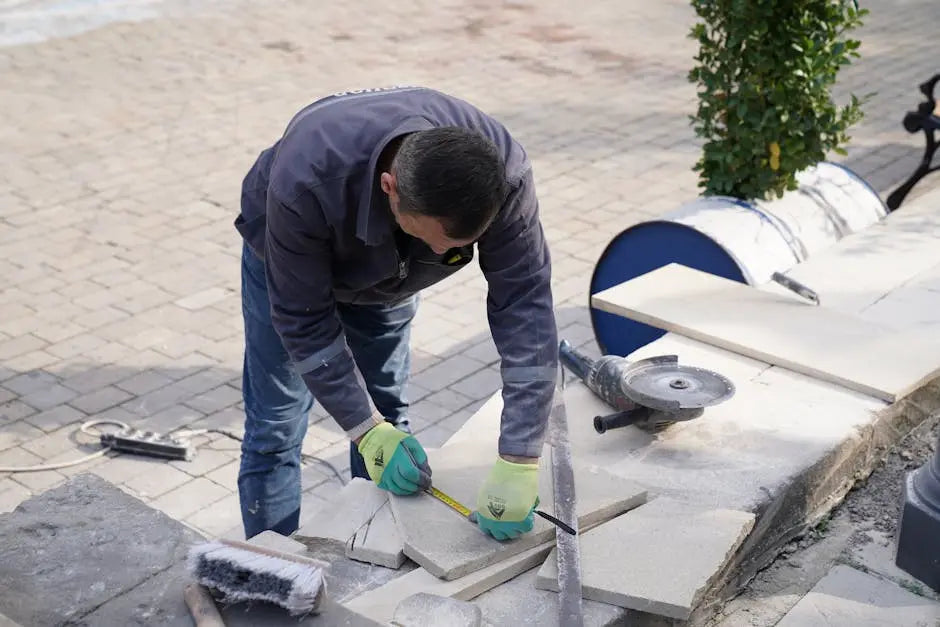
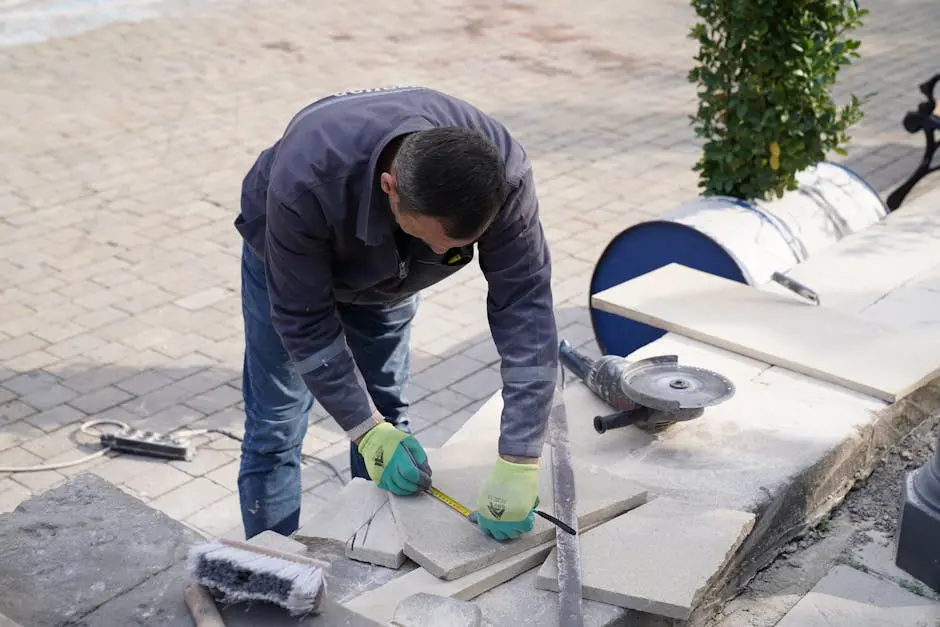
Begin by measuring the space where the tile will be installed. Use a pencil or erasable marker to draw a clear line where the cut will be. Double-check your measurements to avoid mistakes. Once you’re ready, place the tile firmly within the cutter. The key is to align the cutting wheel precisely on the marked line.
For manual cutters, apply consistent pressure as you push the handle down, ensuring a smooth scoring line. If using an electric cutter, adjust the blade to match the depth of the tile and check that it’s aligned correctly before initiating the cut. Always guide the tile slowly through the blade to allow neat, unbroken cuts, avoiding haste which may lead to breakages.
Troubleshooting Common Cutting Issues
Even with practice, cutting issues can arise. This section addresses common problems such as chipping, uneven edges, and misalignment, providing solutions to help you refine your technique and maintain precision.
Chips at the edge of tiles usually indicate too much force being applied or a dull cutting wheel. Always ensure your cutting blade is sharp and replace it when it shows signs of wear. Applying consistent, moderate pressure will help you achieve cleaner cuts without damaging the tile edges.
Uneven edges can result from incorrect alignment of the tile inside the cutter. Make it a habit to check and recheck that your tile is properly aligned before initiating the cut. If alignment issues persist, consider using a tile cutter with a laser guide, which can offer enhanced accuracy by projecting a cutting line on the tile surface.
Safety Tips for Using a Tile Cutter
Safety should always be a priority. We’ll review essential safety tips to ensure your tile cutting experience is not only precise but also safe, protecting you from potential accidents and injuries.
First and foremost, always wear safety goggles to protect your eyes from flying chips and dust. Gloves are also a smart choice to guard your hands from sharp edges and small cuts. For those using electric cutters, ensure the workspace is dry to prevent electric shock. Keeping your work area clean and uncluttered will minimize accidents and increase efficiency.
Lastly, familiarize yourself with your tile cutter’s user manual and understand how to properly maintain it to ensure it operates efficiently. Correct maintenance includes sharpening or replacing blades and ensuring moving parts are clean and well-lubricated. Always unplug electric cutters when not in use or when performing maintenance tasks to avoid mishaps.
Achieve Precision with Every Cut
Mastering the art of precision cuts with your tile cutter is all about understanding your tool, practicing proper techniques, and taking safety precautions. With a bit of patience and practice, you’ll be able to tackle any tiling project with confidence and accuracy. For more information about high-quality tools and additional tiling resources, visit our homepage. Happy cutting!


اترك تعليقًا
This site is protected by hCaptcha and the hCaptcha Privacy Policy and Terms of Service apply.